How to ride a proper Circle
There are two things to think about
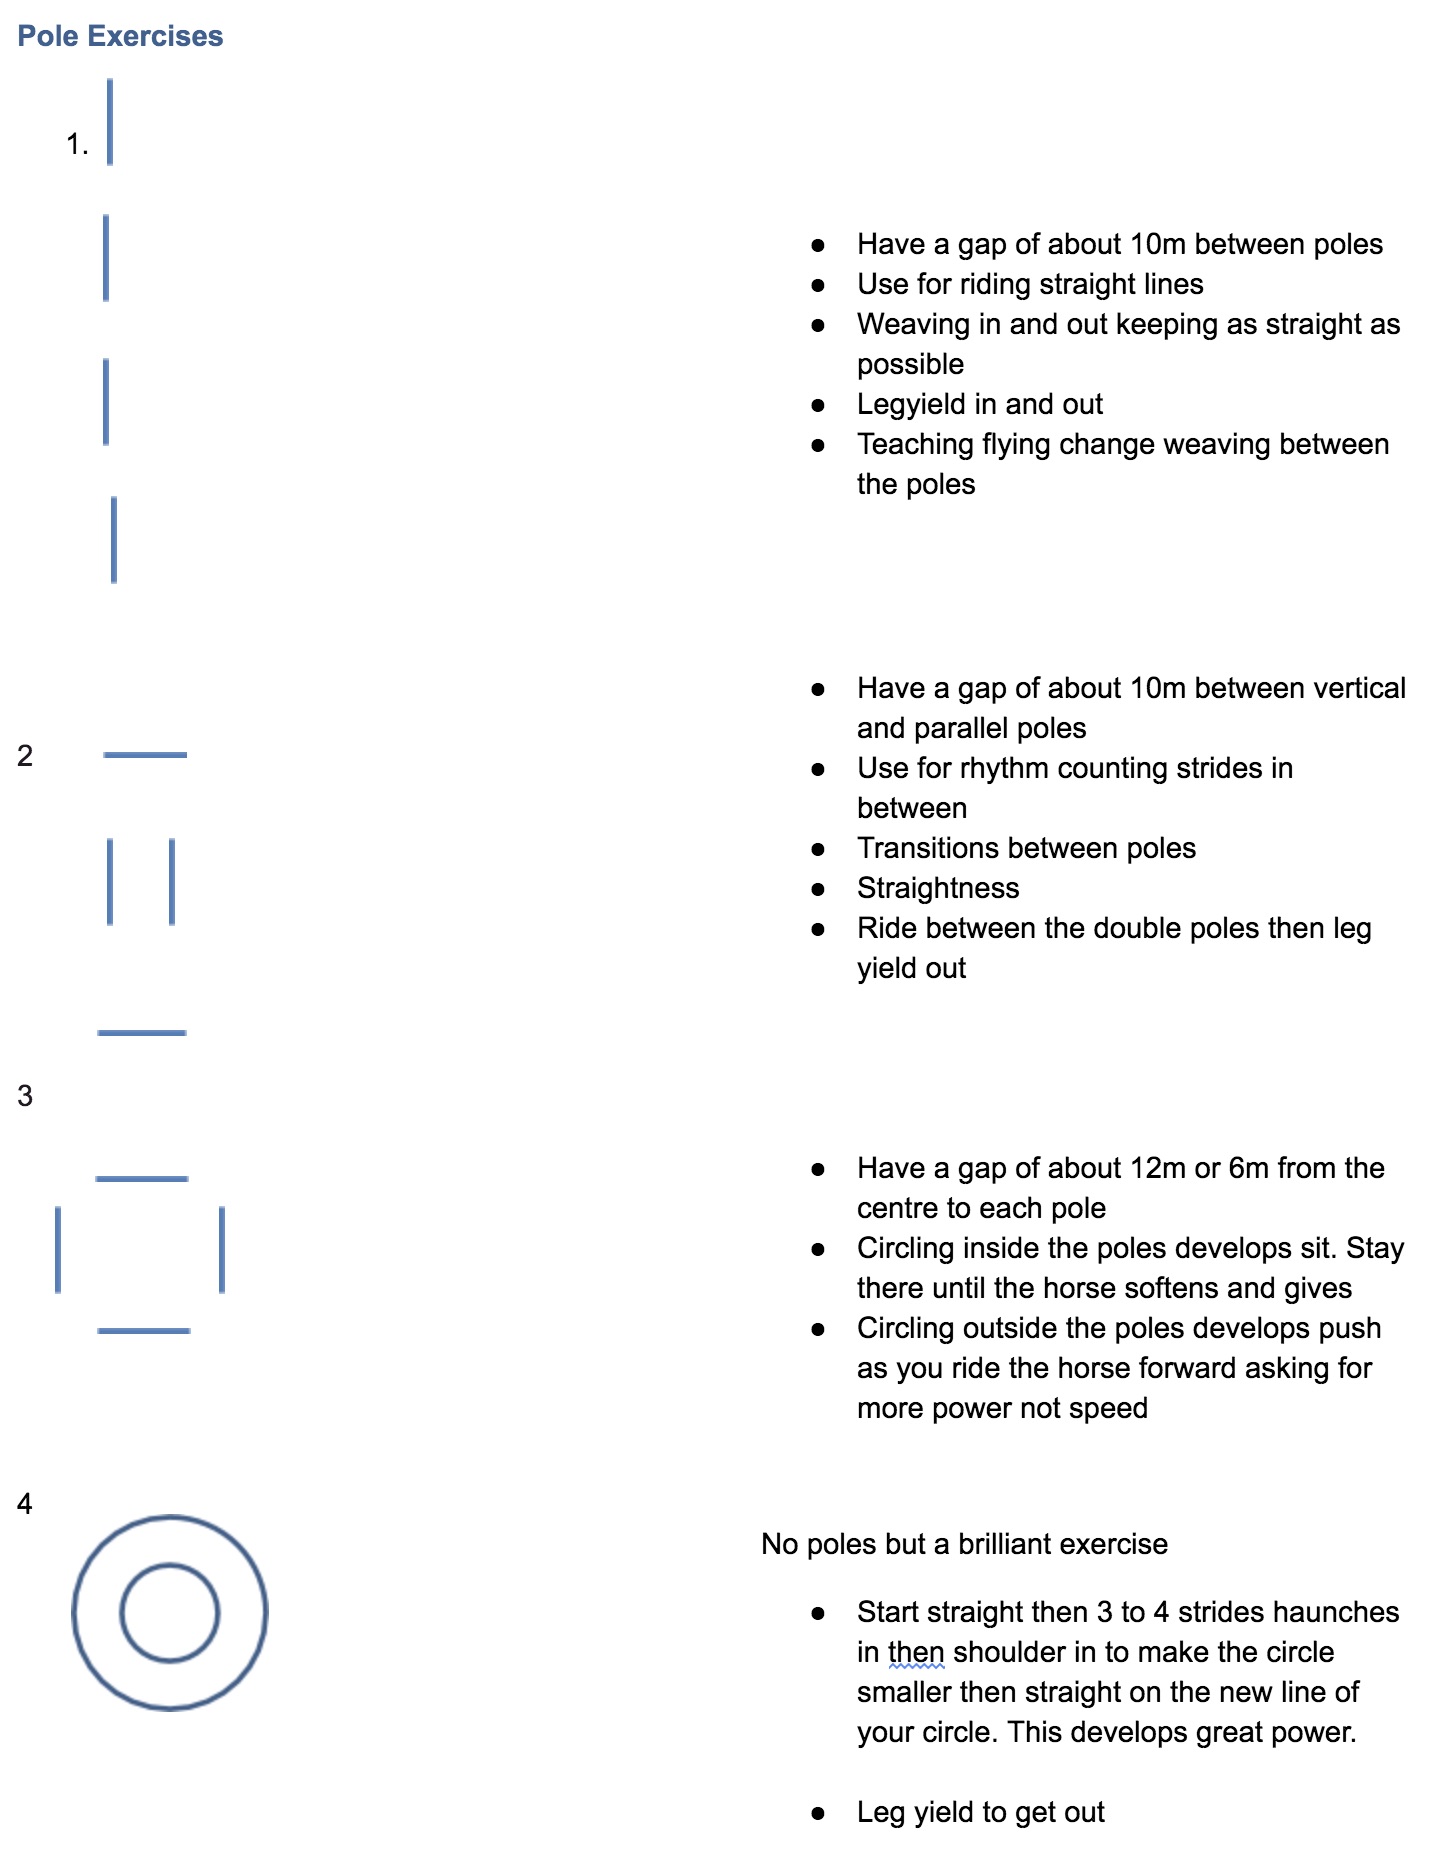
- How the CIRCLE is being ridden geometrically.
- How the HORSE is being ridden on a curved line
Remember, in a circle you should NEVER NOT BE TURNING.
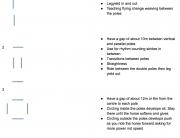
Another mistake is often you will be doing a great job until you reach the side of the arena then end up moving along the rail of the long side for a few strides, all flat. Then you realise you need to turn to get to your next ‘circle point’ and veer sharply off the rail to make it to center line in time. Now you have made a twenty meter shape with some flat sides instead of a circle.
Think of it like this, if you have ever seen tennis balls inside their plastic packaging cylinder, you will notice that they only just touch the edges of the ‘long side’ and ‘short side’ of their container with no flat bits . A circle in a dressage ring is the same, with us always having to ride into, onto and out of every contact point, no matter the size of the circle. If you are on the rail for more than one or two strides then you have been at that point of the circle for too long and it is no longer circle.
The aids and the rider
If you understand the aids for bending, then creating a circle should only be a matter of preparation and practice. Otherwise you will definitely have some issues with the precision of your figure and also the rhythm, balance and suppleness of your horse. These are all basic errors that will stop you progressing in your work. Circles are basic but very important for progress.
You can ride a circle correctly when you can bend the horse’s body laterally according to the shape. Moving the horse away from your inside leg and receiving him into your outside hand. The hind feet should follow exactly in the tracks of the forefeet.
In a correctly executed circle the horse’s inside hind leg carries more weight than the outside one. Before every circle you should prepare the horse with a half halt and transfer your weight a little to the inside seat bone, in the direction of the movement. The movement you make is little. You can achieve this by a slight turn of your belly button to the inside.
The horse should then be flexed in the same direction. The inside rein should guide the horse into the turn, placing his nose on the curve as if you are drawing the circle with his nose.
Your inside leg should be active and close to the girth, causing the horse’s inside hind leg to reach further forward. The outside rein should yield just enough to allow the horse to flex to the inside, while at the same time it restrains the horse from falling out over the outside shoulder. There should still be CONTACT with the outside rein. Your outside leg should control the quarters and stop them from swinging.
When the horse’s wither (forehand) is guided from the straight line into the direction of the turn, the influence of the inside rein is decreased but not lose contact. You should ‘straighten’ the horse with your outside rein; keep the horse exactly on the line of the circle. (‘Straight’ on the circle means making sure that the hind feet follow in the tracks of the forefeet, and that the horse is bent from head to tail according to the curvature of the line.)
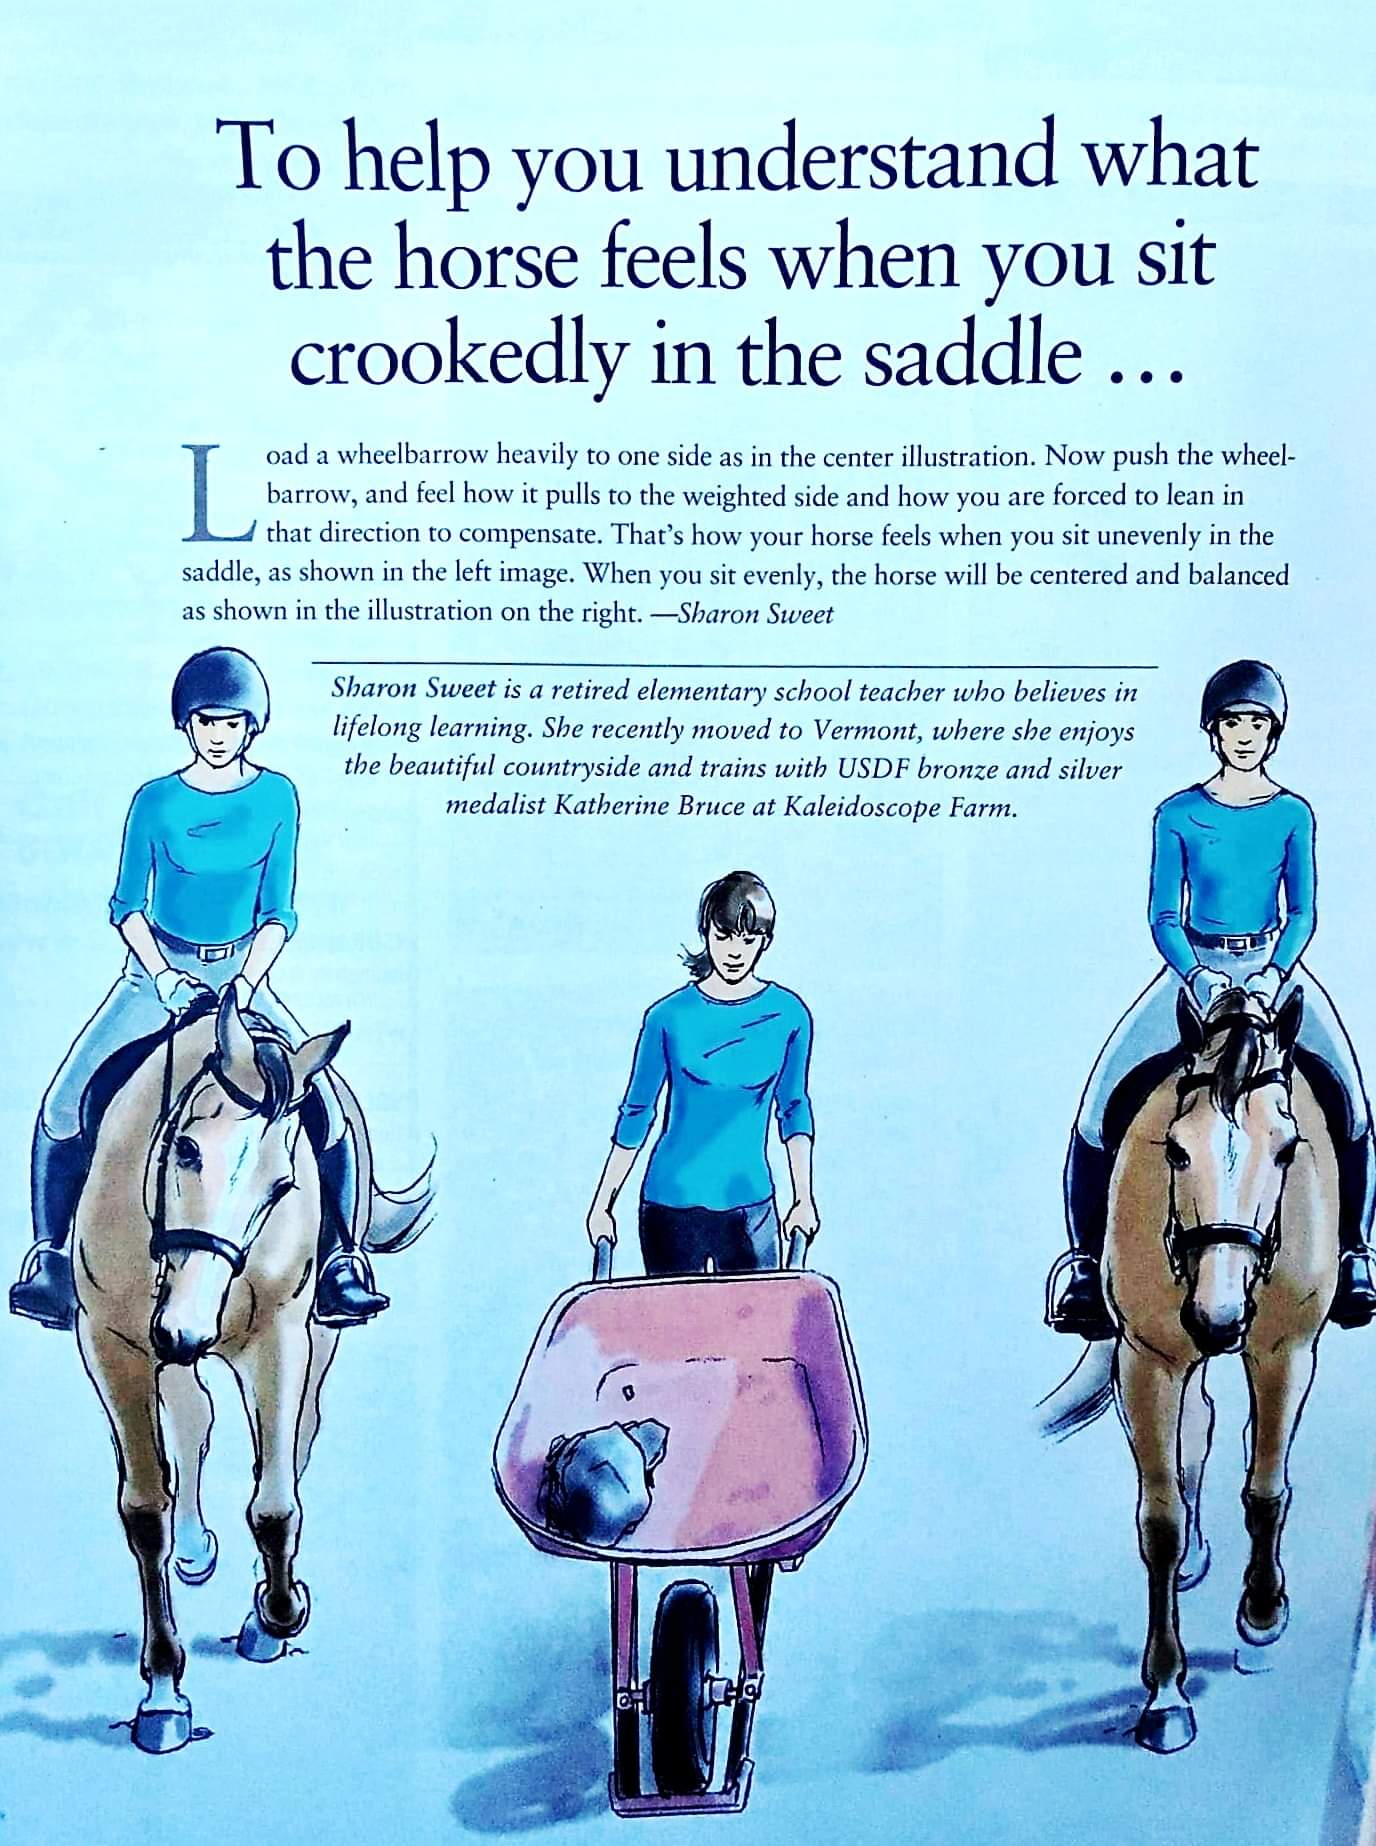
The correct distribution of your weight is important. In transferring some of your weight to the inside seat bone you should push your inside hip forward with a deep knee and turn your belly button to the inside. This will also prevent you collapsing your inside hip and lateral (side) muscles which would slip your seat to the outside. At the same time you should make sure not to leave your outside shoulder behind. Hips in line with horses hips shoulders in line with horses shoulders outside seat bone connected with the saddle NO LEANING to the inside.
AND remember to breathe
Note on turning your Belly Button:
On or off your horse try sitting on your hands with your palms up. Make sure you are sitting on your seat bones. Notice what happens when you turn your belly button left or right. Just a little movement has a big effect on your weight distribution. Make sure not to collapse your side muscles from under your armpit to the top of your hip when you do this.

Follow Us!